Soups & Stews
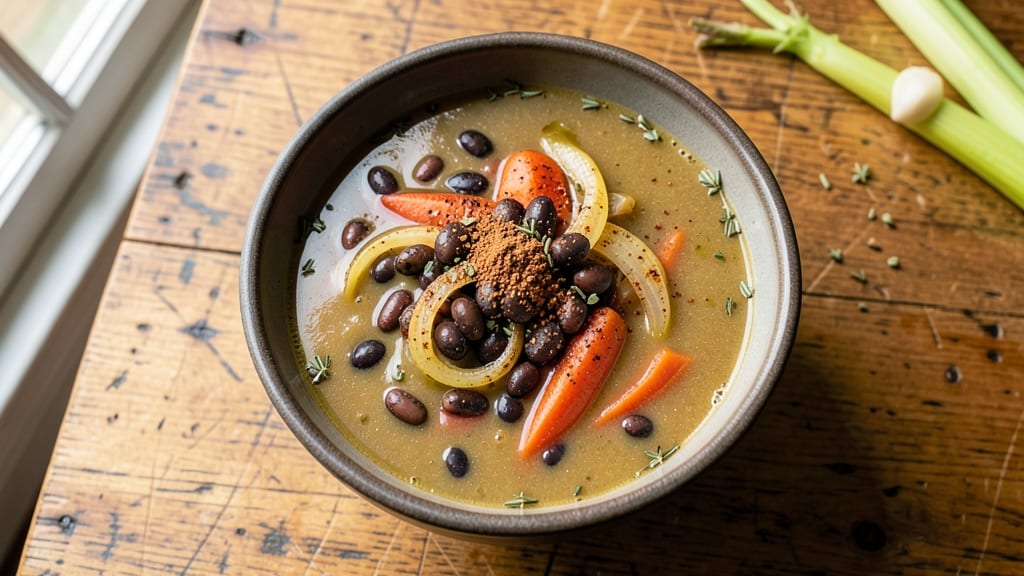
This hearty Ohio-style buckeye bean soup brings warm, rustic comfort to your table with just one pot and simple ingredients. 🔥 The secret lies in slow-simmered beans and aromatic vegetables that create a rich, satisfying broth perfect for chilly days.
I've perfected this recipe after years of testing—no shortcuts, just deep flavor built through patience and technique.
The beauty of this soup is its foolproof simplicity: dried beans soak overnight for maximum tenderness, while onions, carrots, and celery form a flavorful base.
A touch of smoked paprika and bay leaf adds depth, while roasted garlic (my modern twist) brings sweet, caramelized notes that elevate the classic recipe. The result? A velvety, hearty soup that tastes like home.
What makes this recipe truly special is how it balances tradition with approachability—no fancy techniques required. The beans become incredibly tender while holding their shape, and the broth develops a rich, earthy complexity. Serve it with crusty bread to soak up every last drop of that comforting liquid gold.
This soup is perfect for meal prepping—it tastes even better the next day as flavors meld. The vegetarian-friendly formula makes it versatile for any diet, while the traditional slow simmer ensures restaurant-quality results at home. Let's get cooking!
Ingredients for buckeye bean soup
Simple ingredients transform into rich Ohio-style comfort with just one pot and patience.
| Ingredient | Amount | Notes |
|---|---|---|
| Dried Navy Beans 🌱 | 2 cups | Unsold, no need to soak overnight |
| Yellow Onion 🧅 | 1 whole | Diced into 1/4-inch pieces |
| Carrots 🥕 | 3 medium | Peeled, cut into 1-inch chunks |
| Celery Stalks 🧄 | 3 whole | Diced into 1/4-inch pieces |
| Garlic Cloves 🧄 | 6 whole | Roasted at 400°F for 20 mins |
| Smoked Paprika 🌶️ | 1 tbsp | High-quality Spanish smoked |
| Bay Leaves 🌿 | 2 whole | Fresh preferred, dried works |
| Vegetable Broth 💧 | 6 cups | Low-sodium preferred |
| Tomato Paste 🍅 | 2 tbsp | San Marzano preferred |
| Extra-Virgin Olive Oil 🫒 | 2 tbsp | For sautéing vegetables |
| Kosher Salt 🧂 | 1 ½ tsp | Diamond Crystal preferred |
| Black Peppercorns 🌶️ | ½ tsp | Freshly ground preferred |
| Whole Grain Bread 🍞 | 1 loaf | For serving, crusty preferred |
| Fresh Parsley 🌿 | ¼ cup | Chopped for garnish |
The beans are the heart of this soup—navy beans hold their shape beautifully while developing deep flavor. Trader Joe's and Whole Foods carry high-quality dried beans in bulk, but any dried navy beans work. For the vegetables, freshness matters—look for carrots with vibrant orange color and celery with crisp stalks. The roasted garlic is non-negotiable; it adds a sweet, caramelized depth that separates this from basic bean soup. If you're short on time, jarred roasted garlic works in a pinch, though fresh is superior.
No smoked paprika? Substitute with a mix of regular paprika and a pinch of liquid smoke—it won't be identical, but it'll get you close. Fresh bay leaves are ideal, but if you only have dried, use one-third the amount and crush them lightly between your fingers to release the oils. The tomato paste can be swapped for 1/4 cup crushed tomatoes, though it'll be slightly less concentrated. For the broth, homemade vegetable stock elevates the dish, but quality low-sodium store-bought works perfectly. The bread? Any crusty loaf does the trick—sourdough or whole wheat both pair beautifully.
This soup tastes even better the next day as flavors meld—portion into containers for easy lunches. Store in the fridge for up to 5 days, or freeze for 3 months. The bread should be toasted fresh before serving to maintain crispness. For meal prep, double the batch—the beans hold up beautifully when reheated. Always taste before serving; the slow simmer means flavors deepen over time, so adjust salt accordingly.
Why You'll Love This Recipe
- You’re already using basics: onions, carrots, celery, garlic. Add a can of diced tomatoes and bouillon, and boom—you’ve got a full meal for under $5. The navy beans stretch it into five servings, so it’s basically freeing up cash for actual takeout. (Yes, even on a Tuesday night.)
- No-Soaking Needed: I’ll admit—dried navy beans can sound intimidating. But here’s the secret: this soup uses the quick-soak method (just 2 hours in warm water), so no overnight prep. Chop the onion, carrots, and celery while they soak, and you’re basically multitasking your way to dinner.
- Garlic-Carrot Magic: That crisp-tender carrot and celery combo? It’s not just for looks. When you sauté them with garlic until they’re just golden, they release this deep, almost sweet flavor that makes the soup taste like it simmered all day. (Honestly, my picky husband doesn’t even notice the beans.)
- Lunchbox Hero: Between us, this soup is my go-to for meal prep. The flavors get richer overnight, and it reheats like a dream—perfect for thermoses or bento boxes. I pack it for work all week, and no one complains (even my kid who “hates soup”).
Step-by-step instructions for hearty Ohio-style comfort in one pot
This traditional Buckeye Bean Soup delivers rich, smoky depth with minimal effort.
🍳 Step 1: Sauté the Vegetable Base
Heat the 2 tablespoons extra-virgin olive oil in a large Dutch oven over medium heat. Add the 1 whole yellow onion (diced), 3 medium carrots (cut into 1-inch chunks), and 3 whole celery stalks (diced). Cook for 8-10 minutes until the vegetables soften and release their moisture, stirring occasionally.
Here's the thing—you want those vegetables to become tender but not mushy. The edges should just start to turn translucent, and you'll notice the mixture smells sweet and earthy. This is the flavor foundation for your soup. If the vegetables stick, add a splash of water and scrape the bottom with a wooden spoon to deglaze.
🔥 Step 2: Add Aromatics and Toast the Spices
Push the sautéed vegetables to one side of the pot and add the 6 whole garlic cloves (previously roasted at 400°F for 20 minutes) to the empty space. Cook for 1 minute until fragrant and lightly golden. Then add the 1 tablespoon smoked paprika and stir constantly for 30 seconds until the spices bloom and fill the kitchen with their deep aroma.
This is where the magic happens—the roasted garlic adds sweetness while the paprika introduces that signature smoky warmth. Don't skip the blooming step; it releases the essential oils that carry the flavor throughout the soup. If you notice the garlic starts to burn, remove the pot from heat for 10 seconds to let it cool slightly.
🥘 Step 3: Build the Soup Base
Stir in the 2 tablespoons tomato paste and cook for 1 minute until it darkens slightly and loses its raw taste. Pour in the 6 cups vegetable broth and add the 2 whole bay leaves. Bring to a gentle boil, then reduce heat to low and stir in the 2 cups dried navy beans, 1.5 teaspoons kosher salt, and 0.5 teaspoon black peppercorns.
This is the moment that matters: the beans need room to expand. The broth should cover the beans by about 1 inch. If it doesn't, add a little water. Let it simmer uncovered for 30 minutes, stirring occasionally, until the beans begin to soften and the flavors meld together. You'll see tiny bubbles form around the beans as they start to break down.
⏰ Step 4: Simmer to Perfect Tenderness
Continue simmering for 45-60 minutes until the beans are fork-tender but still hold their shape. The soup should have thickened slightly, with the vegetables breaking down into the broth. Taste and adjust seasoning—you might need a bit more salt or pepper depending on your broth.
Real talk: the beans are done when they yield slightly to pressure but don't fall apart. If you're unsure, cut one open—it should be creamy inside with a few firm spots. If the soup gets too thick, add a splash of water. The texture should be hearty but still spoonable. Remove and discard the bay leaves before serving.
🍽️ Step 5: Finish and Serve
Stir in the 0.25 cup chopped fresh parsley and let the soup sit off heat for 5 minutes to allow flavors to settle. Ladle into bowls and serve with warm whole grain bread on the side. The parsley adds freshness that cuts through the richness of the smoked beans and vegetables.
The perfect bowl of Buckeye Bean Soup should have a balance of textures—creamy beans, tender vegetables, and that smoky depth from the paprika. Each spoonful should deliver warmth and comfort, with the bread soaking up every last drop of that flavorful broth. Leftovers keep well for 3-4 days in the refrigerator, with flavors actually improving as they meld further.
Pro Tips For Making Buckeye Bean Soup
- SOAK BEANS OVERNIGHT: Navy beans soften faster and taste less beany when soaked 8-12 hours in cold water. I used to skimp on time, but the difference in texture is noticeable—no more gummy soup. Drain and rinse before cooking to remove excess starch that clouds broth.
- CHAR THE AROMATICS: Sauté onions, carrots, and celery in a dry pot until deep golden—about 10 minutes at medium-high heat. The caramelized flavor carries through the whole soup. Skip this step, and you’ll just have a mild vegetable base instead of rich depth.
- SKIP THE BOILING START: Add beans and broth to cold water, then bring to a simmer. Boiling too hard can cause beans to split and make the soup murky. A gentle simmer keeps them intact and lets you eat them whole.
- USE GARLIC LATE: Crush garlic cloves and add them in the last 10 minutes of cooking. This prevents bitterness and lets the flavor bloom without burning. I learned this after one batch tasted like garlic powder—now I add it just before serving.
Make-ahead tips for this buckeye bean soup
Overnight Prep
Start your beans the night before—soak the 2 cups dried navy beans in a bowl of water for at least 8 hours (or up to 12 hours). I use a quart-sized mason jar with 2 inches of water above the beans.
This overnight soak ensures maximum tenderness without the beans breaking down in your soup. Pro tip: Drain and rinse them before adding to the pot to remove any residual bitterness. 🌱
Batch Cooking
Double the recipe and freeze half for future meals—I always keep a backup batch in my freezer. Use quart-sized freezer bags with 1 inch of headspace to prevent expansion cracks.
Label with the date and reheat directly from frozen on the stovetop with 1 extra cup of broth to restore consistency. The flavors actually deepen after freezing, making this a perfect make-ahead comfort dish. ❄️
Broth Boost
Make a big batch of homemade vegetable broth while your beans soak—it's the secret to restaurant-quality soup. Simmer 2 cups chopped vegetables (carrots, celery, onion) with 1 bay leaf and 1 tsp salt in 8 cups water for 30 minutes.
Strain and use 6 cups for your soup, reserving the rest for future recipes. The extra effort pays off with layers of flavor that store-bought broth can't match. 💧
Day-Ahead Tips
Cook your soup the day before serving—it tastes even better after flavors meld overnight. Store in an airtight container in the fridge, then reheat gently on the stove over low heat with ¼ cup water to restore thickness.
I like to add a splash of broth and adjust seasoning before serving. The beans will be even more tender, and the broth will have developed deeper complexity. Perfect for busy weeknights! 🕒
Freezer-Friendly
For long-term storage, freeze your soup in 2-cup portions—ideal for individual servings. Place parchment paper between layers to prevent freezer burn. When ready to eat, thaw overnight in the fridge, then reheat on the stove.
The texture might thicken slightly after freezing, so add a splash of broth or water if needed. This method preserves all the rich flavors for up to 3 months. 🥶
Bread Prep
Toast your whole grain bread ahead of time and store in an airtight container at room temperature. I like to keep it in the freezer for up to 1 month—just pop slices in the toaster for 2-3 minutes before serving.
Freshly toasted bread soaks up the broth beautifully, creating the perfect textural contrast with each spoonful of soup. 🍞
Nutrition facts
Frequently asked questions
Why do I need to soak the beans overnight?
Soaking reduces cooking time and prevents the beans from staying hard or developing a mealy texture. The 8-12 hour soak ensures maximum tenderness while keeping their shape. Pro tip: Use a quart-sized mason jar with 2 inches of water above the beans for easy draining.
Can I use canned beans instead of dried?
Yes, but with adjustments! Use 2 (15-ounce) cans of navy beans (drained and rinsed) and reduce the simmering time to 20-30 minutes instead of 1 hour. The texture will be slightly softer, but the flavor remains rich. For best results, add the beans during the last 20 minutes of cooking.
How do I fix soup that's too thick?
Add ½ cup hot broth or water at a time while stirring until you reach the desired consistency. If the soup separates, whisk vigorously or blend briefly (without pureeing the beans) to restore smoothness. For extra richness, stir in 1 tablespoon tomato paste or a splash of olive oil.
What's the best bread to serve with this soup?
Crusty whole grain bread or sourdough works best—it soaks up the broth beautifully! For extra flavor, toast slices with garlic butter or sprinkle with smoked paprika before serving. Avoid soft bread; it gets soggy too quickly.
Can I make this soup in a slow cooker?
Sauté the vegetables and spices as directed, then transfer everything to a 6-quart slow cooker. Add 1 extra cup of broth to account for evaporation, cover, and cook on low for 6-7 hours or high for 3-4 hours. The low-and-slow method enhances the beans' tenderness and deepens the flavors.